Printing Messages
Before you're able to receive messages from your channel's Twitch chat, you'll need to log in and connect to Twitch. This process creates the Twitch Chat Connection object that you can store (as a variable), pass between actors and use to interact with Twitch.
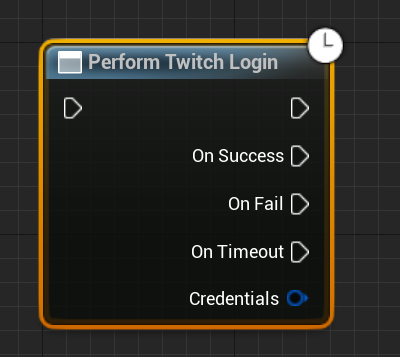
The first step is getting your player to log in to the game with their Twitch account. This is done using the Perform Twitch Login node (other login methods may work differently). This asynchronous node will open a browser window and ask the user to log in to Twitch. Once the user has logged in and switched back to the game window (inside of the editor, you may need to click the PIE window), the node will fire the On Success pin. When this happens, you'll gain access to the Twitch Login Credentials structure that can be used to connect to Twitch.
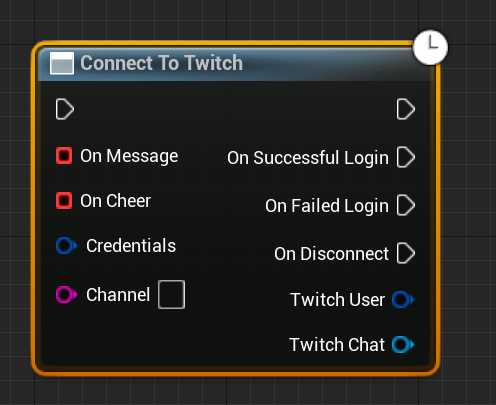
The Connect To Twitch node does just that. It'll connect to a channel's Twitch chat using the credentials you provide, and fire the On Success pin when it succeeds. To ensure backwards compatibility, events that handle messages and cheers must be bound while connecting. This is done by dragging off the two red box pins on the left and selecting Add Event > Add Custom Event.... See this YouTube video for a visual guide.
When we put this all together, and attach a Print String node to the On Message Received event, we end up with the following Blueprint code:
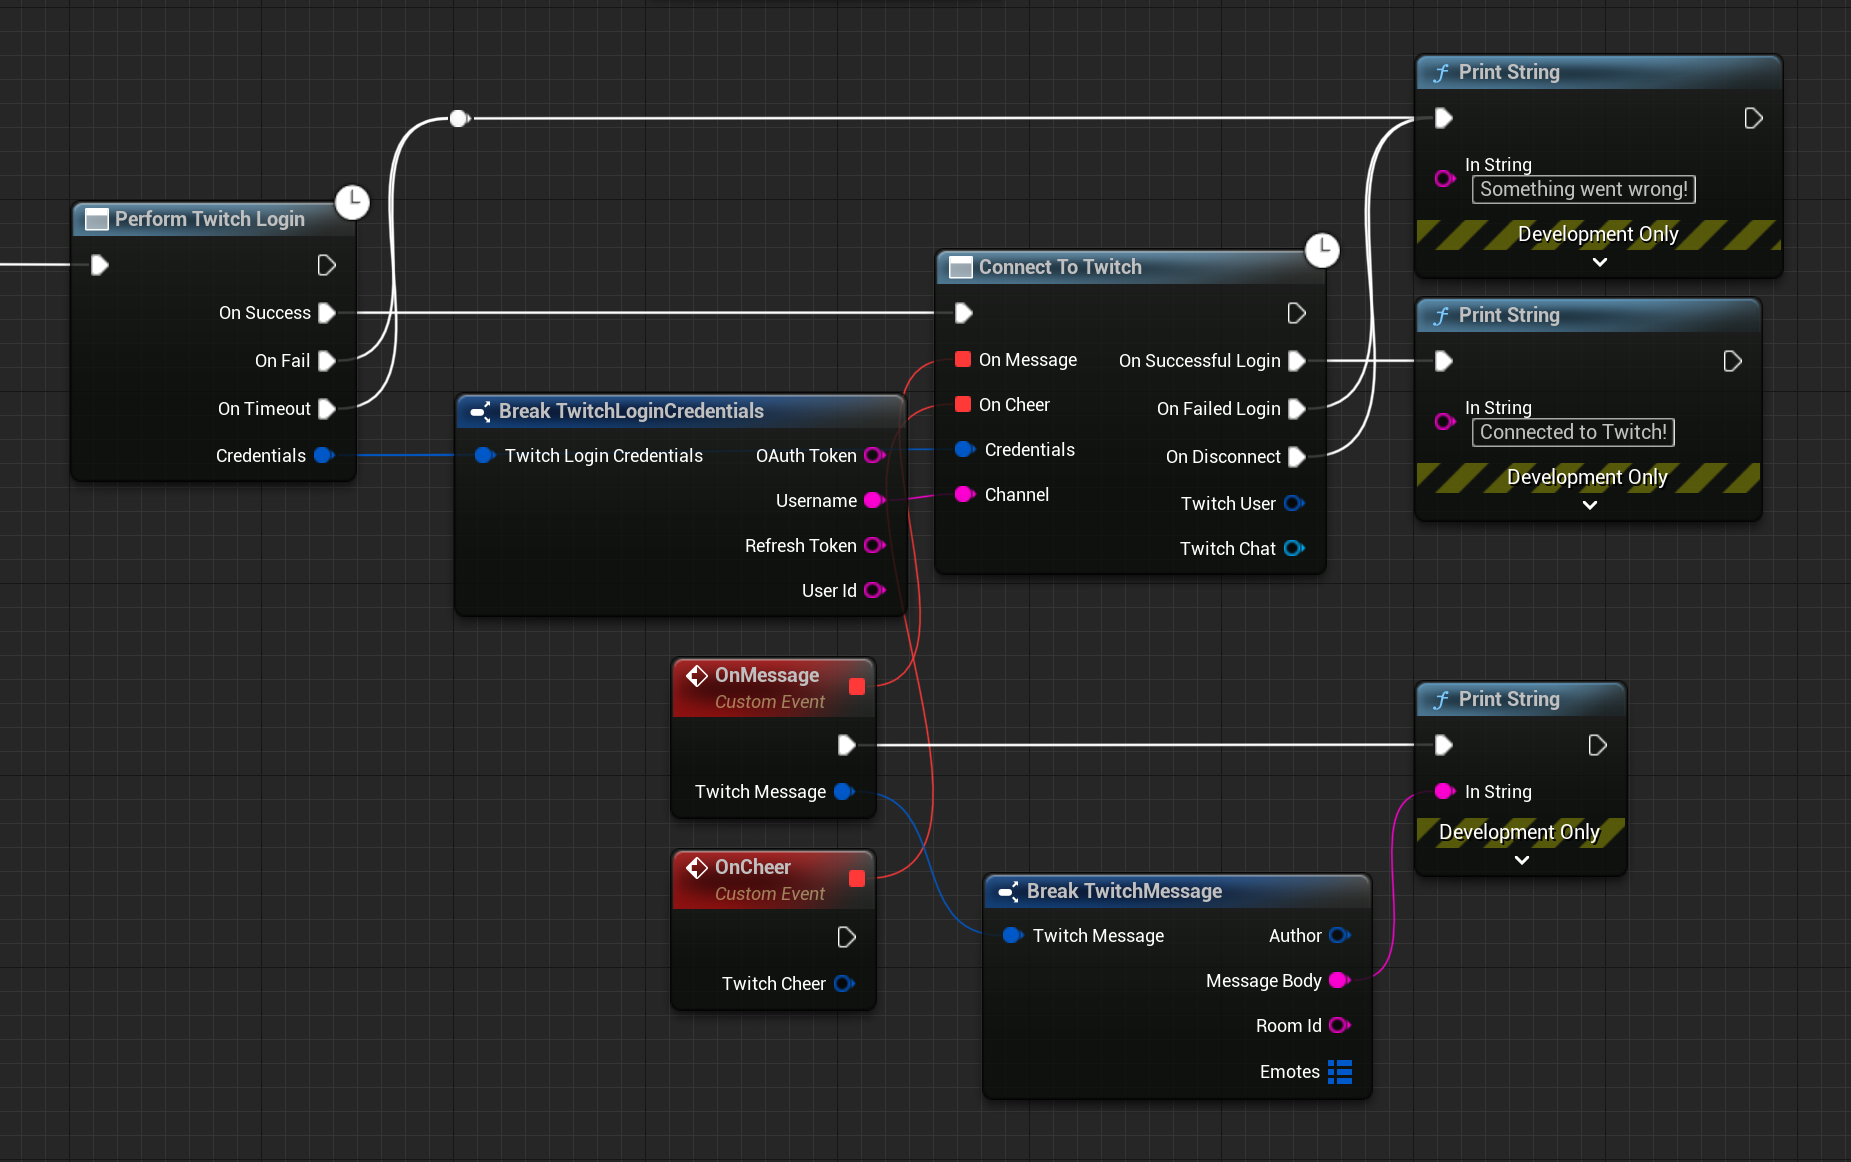
If we connect this code to the Begin Play event of a new actor, place it into the world and run the game we should be greeted by a browser asking us if we'd like to log in/authorize the Hosted Development Backend. Select yes, and once it completes switch back to your game. You might need to click on the PIE viewport for the success message to show up. Now switch back to your browser and type something into your channel's chat. You should see the message printed in your game!